Ah, candied grapes—those crunchy, sweet little treats that look like edible jewels. If you’ve been scrolling through TikTok or Instagram lately, chances are you’ve stumbled upon videos of grapes dipped in candy syrup, glistening with bright colors and fun toppings. It’s no wonder everyone’s obsessed—they’re simple to make, super fun to eat, and let’s be real, ridiculously photogenic.
In this guide, we’ll dive into everything you need to know about candied grapes, from what makes them so popular to how you can whip up a batch right in your kitchen. Along the way, I’ll share tips, flavor ideas, and answers to all those burning questions you’ve been Googling (like how do you store these without turning them into a sticky mess?). Trust me, this is one of those treats you’ll want to make again and again—whether it’s for a party, a snack, or just because you feel like it.
Let’s get started!
Introduction to Candied Grapes
What are candied grapes?
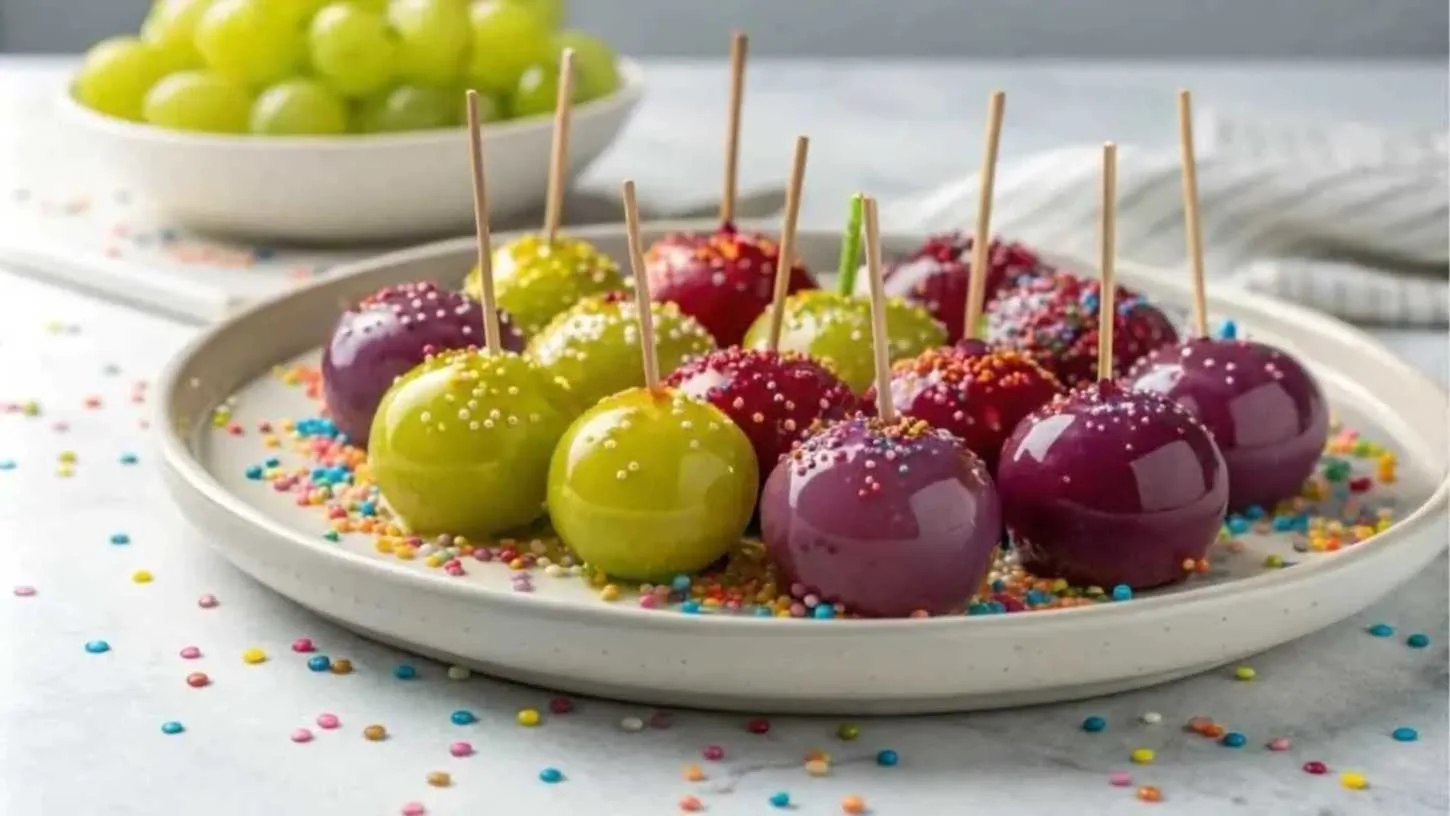
Alright, so what exactly are we talking about here? Candied grapes are fresh grapes dipped into a hot sugar syrup that hardens into a crunchy candy shell. Think of them like candy apples but bite-sized, easier to eat, and way more customizable. Plus, they’re so versatile you can use whatever flavors and toppings your heart desires—bubble gum, watermelon, sprinkles, Pop Rocks…you name it.
These little treats are perfect for kids (who’ll think they’re magic), adults who want a nostalgic sugary snack, or anyone throwing a fun, colorful party. They’re easy to grab, easy to share, and—bonus—they make a great Instagram photo.
A Brief History and Popularity of Candied Grapes
Okay, let’s take a quick stroll down memory lane. While candied fruit has been around for centuries (seriously, think ancient China and candied plums), candied grapes are a modern twist that’s taken off thanks to—you guessed it—social media.
It started with a few viral TikTok videos showing people dunking grapes into glossy candy syrup, and boom—everyone wanted in on the trend. Now, you’ll find thousands of versions: rainbow-colored grapes, galaxy-themed grapes, or even sour-coated ones that make your mouth pucker.
And here’s the thing: They’re not just a pretty snack. Grapes are naturally sweet and juicy, which pairs perfectly with the crunchy candy shell. You get a mix of textures and flavors that’s honestly hard to resist.
If you haven’t tried making them yet, don’t worry—we’ll break it down step by step. Spoiler: You’ll wonder why you didn’t make them sooner.
Why Candied Grapes are Trending
Social Media Influence: TikTok and Instagram Craze
Let’s be real—candied grapes probably wouldn’t be the craze they are today without TikTok and Instagram. You know how it goes: Someone posts a video of glossy, colorful grapes with candy shells, and suddenly, everyone’s trying to recreate it. The #candiedgrapes hashtag has racked up millions of views, and for good reason—these little treats are as pretty as they are tasty.
The magic of social media is that trends like this spread like wildfire. One day, you’re scrolling, and boom—you see someone dipping grapes into candy syrup, rolling them in sprinkles, and biting into a crunchy, sugary snack. It’s mesmerizing, and honestly, it’s no wonder people want to try it themselves.
Plus, candied grapes are practically made for sharing. Whether you’re posting a photo of your rainbow-colored batch or filming your first bite for TikTok, they’re guaranteed to rack up likes and comments. And let’s face it, it’s just plain fun to make a trendy treat you’ve seen online.
Health Benefits of Grapes Combined with Indulgence
Now, I’m not going to tell you that candied grapes are a health food—because, let’s be honest, they’re coated in sugar. But underneath that sugary shell, you’ve still got fresh, juicy grapes. And grapes, as we know, come with plenty of health benefits.
They’re loaded with antioxidants, vitamins, and natural sugars, making them a slightly better option than your average candy bar. Plus, they’re bite-sized, so you can satisfy your sweet tooth without going overboard.
Here’s the kicker: By using grapes as the base, you’re mixing indulgence with a little bit of “hey, at least it’s fruit!” It’s a win-win for anyone who wants to snack without too much guilt.
Candied Grapes for Special Occasions and Parties
If you’re looking for a snack that’s perfect for parties, candied grapes are the way to go. Think about it: They’re colorful, easy to grab, and totally unique. You can customize them with different flavors, colors, and toppings to match any theme—baby showers, birthday parties, or even just a fun movie night with friends.
Want to make them extra special? Try creating a “grape bar” where guests can dip and decorate their own candied grapes. Kids will love it (and let’s be honest, so will the adults). It’s an easy way to impress without spending hours in the kitchen.
Ingredients and Equipment Needed to Make Candied Grapes
Essential Ingredients
Alright, let’s talk about what you’ll need to whip up a batch of candied grapes. The good news? You probably have most of these things at home already. Here’s your shopping list:
- Fresh Grapes: Go for seedless green or red grapes. Green grapes are popular because they don’t bleed color, but red ones are just as tasty.
- White Sugar: This is the star of the show—plain granulated sugar works perfectly.
- Corn Syrup: Light corn syrup helps keep the candy coating smooth and glossy.
- Water: Just a little bit to mix with the sugar and syrup.
- White Gel Food Coloring: This gives the candy a blank, opaque base for adding fun colors.
- Flavored Oils: Here’s where the magic happens. Cotton candy, watermelon, and caramel are popular, but you can get as creative as you want.
- Gel Food Coloring: Go wild with colors like neon pink, blue, or even rainbow.
And don’t forget the toppings! Sprinkles, Pop Rocks, sour powder—you name it.
Necessary Equipment
Before you get started, make sure you’ve got the right tools. Trust me, it’ll make the whole process easier (and safer).
- Candy Thermometer: This is a must. You need to heat the sugar mixture to exactly 300°F, or it won’t harden properly.
- Skewers or Toothpicks: These make it easy to dip the grapes without burning your fingers.
- Parchment Paper or Silicone Mat: Once the grapes are dipped, you’ll need somewhere to let them cool and harden.
- Small Saucepan: For cooking the candy syrup.
- A Spoon or Skewer for Mixing: You’ll need this for swirling in your food coloring and flavoring oils.
Tips for Gathering Ingredients Quickly
Here’s a little tip: Most of the ingredients, like corn syrup and sugar, are pantry staples, so you won’t need to make a special trip. But for flavored oils and gel colors, check craft stores like Michaels or order them online. Amazon usually has a ton of options (and let’s be real, Prime shipping is a lifesaver when you’re in a pinch).
Step-by-Step Recipe for Perfect Candied Grapes
Preparing the Grapes

First things first—grab your grapes and give them a good wash. No one wants dusty candy grapes! Fill a bowl with water, add a splash of vinegar, and let the grapes soak for about 5 minutes. This step removes any wax or residue that could stop the candy coating from sticking. Rinse them well and pat them completely dry. Trust me, if they’re even a little wet, the candy won’t stick properly.
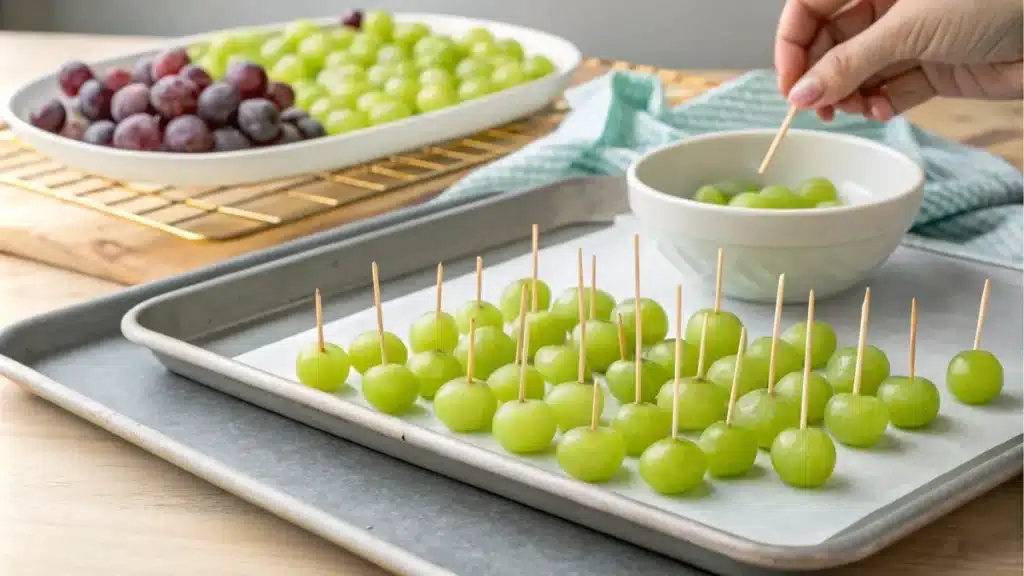
Next, skewer each grape using a toothpick or small skewer. Don’t push too hard, or you’ll break through the other side—just enough so it’s secure for dipping. Pro tip: Get this step done before cooking the sugar so you’re not scrambling later.
Making the Candy Coating

Now comes the fun part—cooking up the candy. In a small saucepan, mix together:
- 2 cups of sugar
- 1/4 cup light corn syrup
- 1/2 cup water
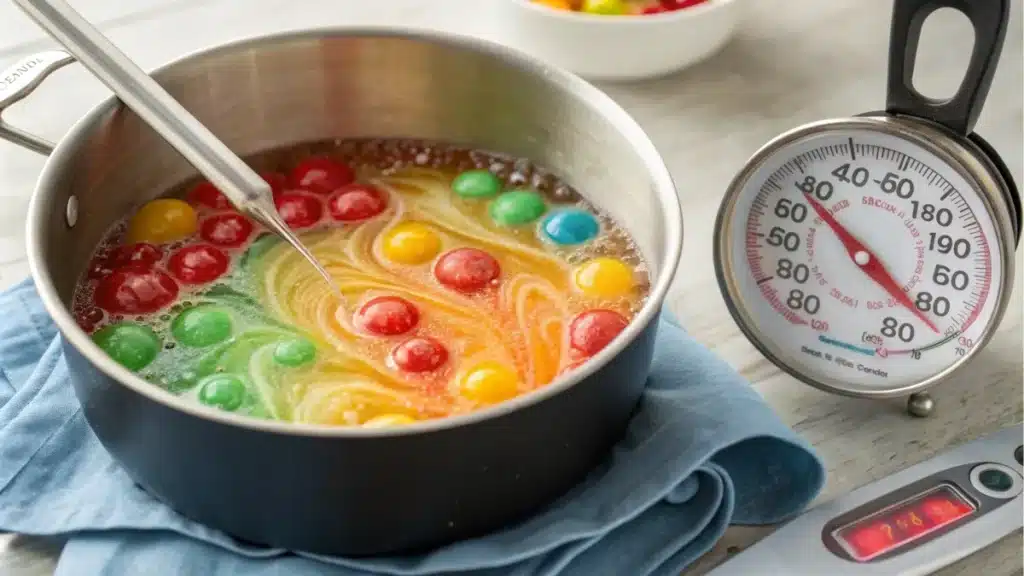
Place the saucepan over medium heat, and pop in your candy thermometer. Here’s the key: do not stir once it starts boiling. Stirring can cause the sugar to crystalize, and no one wants that mess.
When the thermometer reads exactly 300°F (also known as the “hard crack” stage), take the pan off the heat immediately. Carefully stir in your flavoring oil and a few drops of white gel food coloring. This creates a neutral base for adding fun colors. Add your favorite gel food coloring—just a couple of drops—and give it a quick swirl.
Dipping and Decorating the Grapes
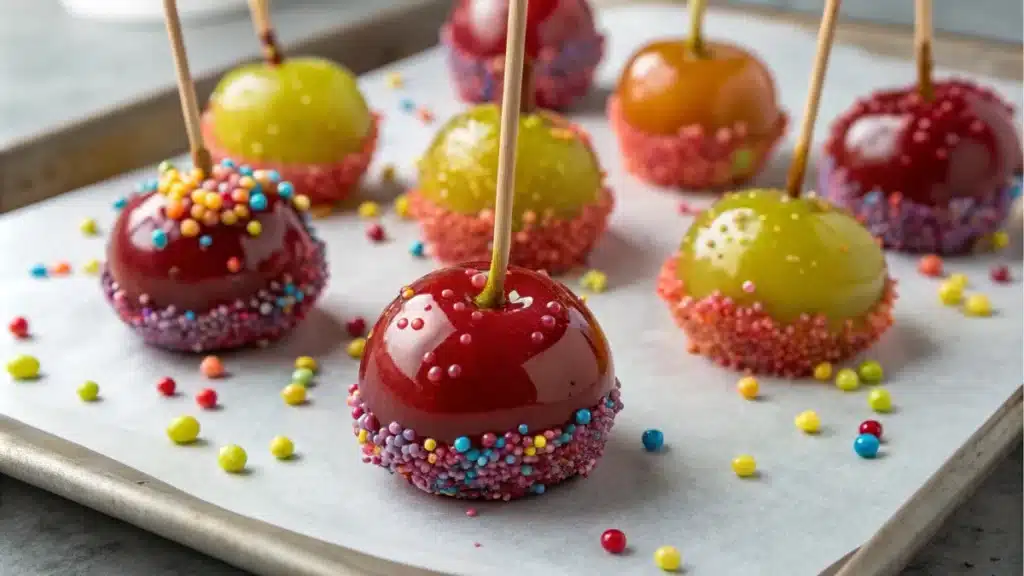
Here’s where you’ll need to work fast. The candy starts hardening quickly, so dip each grape into the hot syrup, swirling to coat it evenly. Let any extra syrup drip off, and if you’re feeling fancy, roll the dipped grapes in sprinkles or Pop Rocks right away.

Place each finished grape on parchment paper or a silicone mat to cool. In about 15 minutes, the candy coating will harden completely. Want them faster? Pop them in the fridge for a quick chill.
And there you have it—perfectly crunchy candied grapes!
Flavor and Color Variations for Candied Grapes
Popular Flavors to Try
The beauty of candied grapes is that you can customize them any way you like. Want something fruity? Try watermelon, tropical punch, or grape flavoring. More into dessert vibes? Caramel flavor makes these taste like tiny caramel apples—seriously, so good.
Some fun flavors to try:
- Cotton Candy: Sweet, nostalgic, and always a crowd-pleaser.
- Sour Apple: Add a sprinkle of sour powder for an extra kick.
- Bubble Gum: Kids especially love this one.
- Caramel or Butterscotch: Perfect for fall parties.
You can find candy flavoring oils online or at craft stores like Michaels or Hobby Lobby. These oils are super concentrated, so a little goes a long way.
Creative Color Combinations for Visual Appeal
Now, let’s talk about making your candied grapes look as good as they taste. Start with a white base (that’s where the white gel food coloring comes in), and then add a few drops of bright gel colors.
- Galaxy Grapes: Swirl in neon blue and purple for a cosmic vibe.
- Rainbow Grapes: Make each grape a different color—perfect for parties.
- Pastel Perfection: Use soft pinks, blues, and greens for a springtime feel.
Want to take things up a notch? Roll the candy-coated grapes in edible glitter, sprinkles, or even crushed-up sour candies. They’ll look like something straight out of a fairy tale.
For more colorful and fun dessert ideas, check out this Lemon Blueberry Ice Cream Recipe. It’s another sweet treat that’s perfect for parties or just a fun day in the kitchen!
Storage and Shelf Life of Candied Grapes
How to Store Candied Grapes Properly
So, you’ve made a beautiful batch of candied grapes, and now you’re wondering how to keep them crunchy and fresh. The truth is, these little treats can be a bit tricky when it comes to storage, but don’t worry—I’ve got you covered.
First off, avoid using paper towels or anything that could stick to the candy coating. Instead, place the candied grapes on parchment paper or a silicone baking mat and let them cool completely. Once they’re hardened, transfer them to an airtight container. If you’re making them for a party or just want to keep them overnight, the fridge is your best bet.
Here’s a quick tip: Don’t stack them! Lay them out in a single layer to keep the candy shells from sticking to each other. If you’re in a rush, a quick chill in the freezer works wonders to harden the candy coating without turning the grapes into icy rocks.
Freezing vs. Refrigerating: Pros and Cons
Let’s break it down—should you freeze or refrigerate candied grapes? Both methods work, but there are a few differences:
- Refrigerating: This is great for short-term storage. Your grapes will stay crunchy for up to 2 days in the fridge. Just make sure they’re in a sealed container to prevent moisture from softening the candy.
- Freezing: If you want them to last longer, freezing is the way to go. Candied grapes can stay good in the freezer for up to 3 weeks. Plus, they taste amazing straight from the freezer—like tiny, crunchy slushies.
The only downside to freezing is that when the grapes thaw, condensation can make the candy coating sticky. If you’re serving them for an event, keep them frozen until right before serving to avoid any mess.
Common Mistakes and Troubleshooting Tips
Why Won’t the Candy Stick to the Grapes?
One of the most common problems people run into when making candied grapes is that the candy coating just won’t stick. If this has happened to you, don’t worry—it’s an easy fix.
The most likely culprit? Wet grapes. Even a tiny bit of moisture can prevent the sugar from sticking properly. Always make sure your grapes are completely dry before you start dipping them. Pat them dry with a clean towel, and then let them sit for a few minutes to air-dry.
Another tip: Make sure your candy mixture is hot enough. If the temperature doesn’t hit 300°F (the hard crack stage), the syrup won’t harden into that perfect, crunchy shell.
Avoiding Sugar Hardening Too Quickly
Sugar syrup can be temperamental. If it cools too quickly, you might find yourself struggling to dip the last few grapes. To keep things moving smoothly, work quickly—dip, swirl, and place each grape on parchment paper right away.
Here are a couple of tricks to make life easier:
- Keep the candy mixture on very low heat to prevent it from hardening in the pot. Just be careful not to overcook it.
- Prepare everything beforehand—skewers, toppings, parchment paper—so you can move fast once the syrup is ready.
Maintaining Grapes Without Getting Soggy
Nobody likes soggy grapes, right? If your candied grapes are losing their crunch, moisture is likely the issue. This often happens when they’re stored in the fridge for too long or aren’t dried properly before dipping.
To fix this, store them in an airtight container and avoid stacking. If you live in a humid area, consider popping them in the freezer for longer storage. Just be sure to serve them straight from the freezer to keep that satisfying crunch.
Got your grapes perfectly crunchy? Awesome! If you love simple and sweet treats like this, you’ll enjoy our Chocolate Chip Waffles. They’re easy to make and a total crowd-pleaser for breakfast or dessert!
FAQs:
How Long Do Candied Grapes Last?
One of the most common questions people ask is, “How long do candied grapes last?” If stored properly, they can stay fresh and crunchy for about 2 days in the refrigerator. To extend their shelf life, you can freeze them for up to 3 weeks.
Here’s the trick: Store them in an airtight container lined with parchment paper, and make sure they’re not touching each other. This keeps the candy shell intact and prevents them from sticking. If you’re freezing them, serve them straight from the freezer for the best texture—they’re surprisingly good cold!
Can You Use Frozen Grapes for Candied Grapes?
While frozen grapes are a delicious snack on their own, they don’t work well for making candied grapes. The reason is simple: as frozen grapes thaw, they release moisture. This can cause the hot sugar coating to slide right off or become sticky instead of hardening into that perfect shell.
If you really want to use frozen grapes, let them thaw completely and pat them bone dry before dipping them into the sugar mixture. Otherwise, stick with fresh, dry grapes for the best results.
What Are the Best Grapes for Candying?
The best grapes for candying are seedless grapes, hands down. Green grapes are the most popular because their color pops beautifully under the candy coating, but red and black seedless grapes work just as well.
If you’re going for aesthetics, choose grapes that are firm and evenly sized. Smaller grapes can be tricky to skewer, so medium-sized ones are ideal.
Can You Reheat the Candy Mixture?
Reheating the candy mixture is possible, but it’s a bit tricky. If your sugar syrup starts to harden before you’re finished dipping, return the saucepan to low heat. Stir gently until it’s smooth and reaches a fluid consistency again. Be careful not to overheat it, though, as this can burn the sugar.
Pro tip: Always work quickly and prep everything beforehand so you don’t have to reheat at all. It’ll save you time and effort.
Conclusion
Whether you’re making them for fun, sharing the recipe with friends, or posting your masterpiece on social media, these terms will come in handy.
With all these tips, tricks, and ideas, you’re now ready to make the most delicious and eye-catching candied grapes ever. If you’re looking for other sweet and simple recipes, check out our Chocolate Chip Waffles for another fun treat that’s sure to please the whole family.

